 EZVIZ no longer supports Internet Explorer 10 or earlier versions, and the site may not behave as expected. Please upgrade to a newer browser.


 Store
Store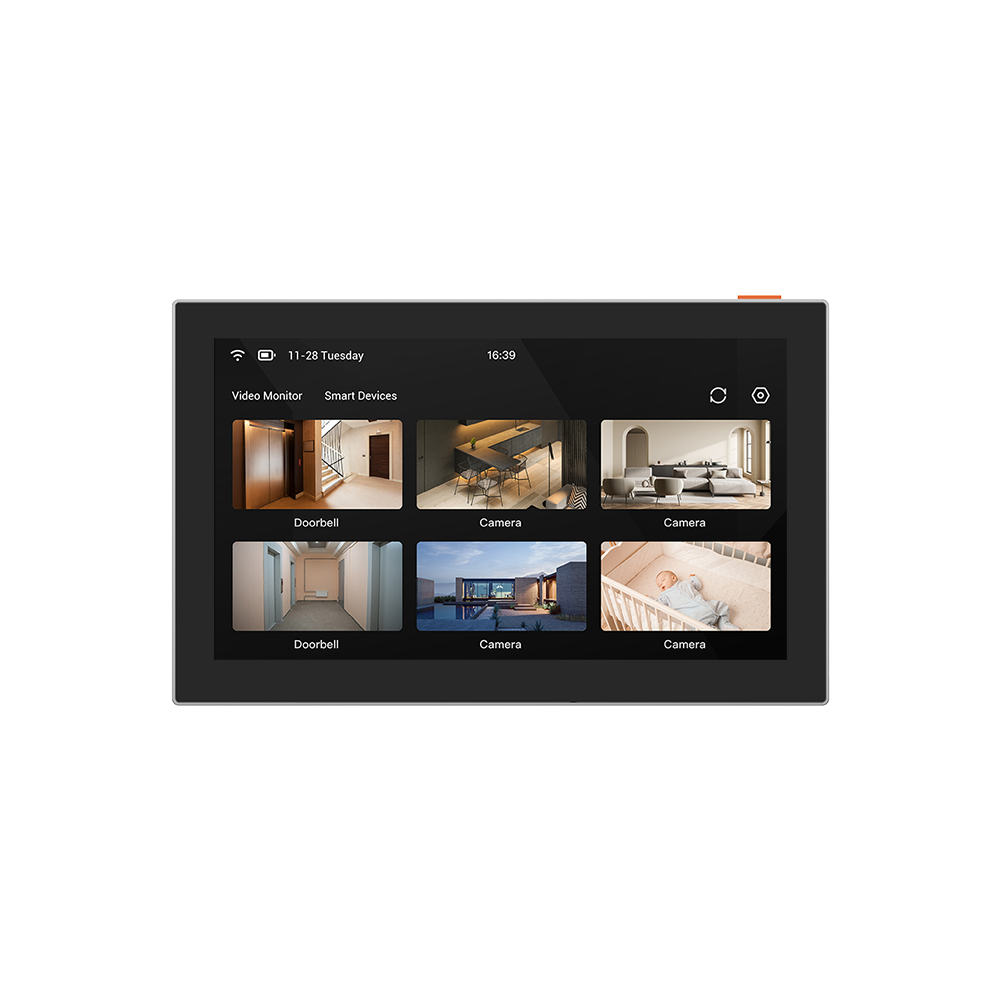

 FAQ
FAQ
 Manuals
 Datasheet

 FAQ
FAQ
 Manuals
 Datasheet
Before adding your other EZVIZ devices to the SD7 smart screen, please note the following:
1. Ensure that both the SD7 and your other EZVIZ devices are linked to the same EZVIZ account.
2. Enable “Terminal Authorization” for the SD7 device by navigating to its Device Settings > More > Terminal Authorization.
Next, please follow these steps to add your other EZVIZ devices to the SD7 screen:
1. On the home page, tap the SD7 device card to access the device linkage page.
2. Tap the “Link Device” button.
3. Select either a single device or multiple devices that you wish to link, then tap "Link". For smart video doorphone devices, please select their corresponding doorbell and make sure the that “Terminal Authorization” for the smart video doorphone devices are also enabled by navigating to Device Settings of their monitor> More > Terminal Authorization.
4. Wait for the confirmation message indicating “Linked successfully.”
5. Return to check the linked devices. If you wish to unlink any device, tap the three-dot icon located to the right of the device name. This will reveal the “Unlink” button.
Applies to: DP1/DP2/CP4 door viewer
You may try the following steps to initially set up your EZVIZ door viewer with touch panel:
Step 1: Power on your device by pressing the power button.
Step 2: Click the "Settings" button on the screen.
Step 3: Tap "Network settings".
Step 4: Select the WiFi network you want to connect to.
Step 5: Enter the WiFi password until the connection is successful. Please ensure that your Wi-Fi password is less than 32 characters and excludes special characters.
If you fail to configure the device, we suggest you may check the below network requirements first:
1. Ensure that you have connected your mobile device to 2.4G Wi-Fi.
2. Ensure that your Wi-Fi network connection is good and functional. Most EZVIZ devices perform better when upload speed is greater than 2 mbps for each camera.
3. Ensure that your Wi-Fi network signal is good. Try to avoid obstacles and interference such as wall, elevator, microwave, washing machines, and Bluetooth devices.
4. Ensure that DHCP settings on your router is on.
5. Ensure that when you configure network, your EZVIZ device is close to your Wi-Fi router. We do suggest that you keep the distance shorter than 1.5 meter.
6. Ensure that the Wi-Fi security on your router is WPA or WPA2, and your Wi-Fi password is less than 32 characters and excludes special characters.
By following these steps, you can effectively troubleshoot and resolve issues with your EZVIZ door viewer's connection to Wi-Fi. If you need further assistance, don't hesitate to contact our support team for personalized guidance.
