 EZVIZ no longer supports Internet Explorer 10 or earlier versions, and the site may not behave as expected. Please upgrade to a newer browser.


 Store
Store

 FAQ
FAQ
 Tutorial Video
 Manuals
 Datasheet

 FAQ
FAQ
 Tutorial Video
 Manuals
 Datasheet
If you encounter difficulties when trying to initialize the SD card via the EZVIZ APP, below are some troubleshooting steps to resolve the issue for you:
1. Ensure both the firmware of your camera and EZVIZ APP are running on the latest version.
2. Ensure the SD card is class 10 or rated at UHS-1. The file format of the SD card should be FAT32 for capacities below 64GB and exFAT for capacities of 64GB and above. Click "Here" to view partial test results of SD card compatibility.
3. Power off your camera, remove and reinsert the SD card, power the camera on and then initialize the card again on the EZVIZ APP.
4. To further rule out the SD card issue, you may try to test with a different SD card or install the card in question on another EZVIZ device.
5. Try to factory reset your camera by holding the Reset button. This will turn the device to the default factory settings and might help resolve minor issues.
If the issue remains unresolved, please contact the "EZVIZ support team" for further assistance.
Here are usually three ways for you to download the recordings:
1. You can manually record the video while in live view mode or playback mode. While in live view or playback mode > Tap on the "Record" icon to start the manual recording. Once the recordings have been completed, your video will be saved to "My Album" on the EZVIZ APP as well as in the Gallery(Album) on your phone.
2. If you have CloudPlay service or if your camera supports downloading recordings stored in the SD card via the EZVIZ mobile app, you may follow the steps below: enter the live view page > find the video clip you want to save and tap the "Download" button at the bottom right > then tap the recording clip again and it will be added to the download list automatically. Then you may check the recording(s) in "My Album" on the EZVIZ APP as well as in the Gallery(Album) on your phone.
3. Alternatively, for some specific models, if you want to export the recordings saved on the SD card, you can also do it through EZVIZ Studio by following the steps below:
1) Download and install the EZVIZ PC studio on a Windows PC
2) Put the camera and PC under the same LAN
3) Configure the Advanced settings by following the instructions here
4) Click All devices and enter the Advanced Settings--Storage--File, then choose the date you want to and export it
*Related Articles:
Models that support the direct downloading of videos stored on an SD card through the EZVIZ App
Please follow the steps below:
Step 1: From the "Events" Page, tap the upper right corner
Step 2: Tap "Push Notification Settings".
Step 3: Tap "Email Alerts".
Step 4: Select the devices you would like to receive notifications for and tap "Save".
Note: If your account is not linked to an email address, please link an email address first. then select the devices for which you would like to receive notifications and tap "Save", the linked email address would be able to receive the notifications.
Please follow the steps below:
1. Make sure that the Wi-Fi router is good and functional. You can check it on EZVIZ mobile app by clicking "Network Testing" on the configuration failed page or check if your mobile phone can browse the Internet by turning off data and connecting only to Wi-Fi.
2. For EZVIZ devices that support 2.4G Wi-Fi only, ensure that you connect your mobile phone to 2.4G Wi-Fi before network configuration.
3. Make sure that your Wi-Fi network signal is good. Most EZVIZ devices perform better when the upload speed is higher than 2 Mbps for each camera. You can check your Wi-Fi signal in the EZVIZ mobile app by clicking the "Account" button in the lower corner of the Home Page--Settings--Device Network Tools--Check Wi-Fi Signal.
4. If not good, please follow the steps below to improve your network:
- you can try to move the camera closer to your router, avoid obstacles and interferences such as wall, elevator, microwave, washing machines and Bluetooth devices.
- If possible, unplug some infrequently used devices from your router or reboot the router.
- Try to change the Wi-Fi channel to a less crowded one.
5. Please also review some other network requirements that may help resolve your issue:
- Make sure that DHCP is enabled on your router.
- Verify that IPV6 is turned off on your router.
- Make sure that the blacklist/whitelist firewall settings are turned off on your router.
6. If your camera supports Ethernet cable, you can also try to connect it via cable. Alternatively, if possible, try connecting the camera to another home Wi-Fi.
If the issue remains unresolved, please contact the EZVIZ support team for further assistance.
*Related Articles:
What should I do if the app says "Unable to join network EZVIZ_SN" during the configuration process
What should I do if the app says "Incorrect Device Wi-Fi Password" during the configuration process
What should I do if the device prompts "Incorrect Wi-Fi Password" during the configuration process
Where to find the EZVIZ device verification code
Please note that sharing can be done in two different ways:
1. Using the Same Login Credentials: You can view the same device using the same login credentials. This means that if you provide your friend or family member with your email address or phone number associated with your EZVIZ account, along with the password, they can access the same device on that account simultaneously.
2. Sharing Your Device with Friends: This method allows you to grant friends and family the privilege to view your device without them owning it. You can achieve this using the EZVIZ App by following these steps:
- Step 1: Log in to your EZVIZ account, and tap the "Account" button in the lower right corner of the Home page.
- Step 2: Tap "Family & Guests".
- Step 3: Tap "Add Sharing".
- Step 4: Enter the email address or phone number registered with the EZVIZ account that you would like to share with, ensuring that the region of the guest account is the same as the owner account, then tap "Continue".
- Step 5: Select the devices you wish to share, and you can edit the permissions by tapping on the device. (Note: Please remember to select "Authorize encryption password” at the bottom; otherwise, the shared account may request the encryption password to view the device.)
- Step 6: Tap "Add sharing" at the bottom. When sharing devices with others, consent is required first. Therefore, toggle the two agreements of "EZVIZ family sharing service" and "EZVIZ service agreement" on the left side and tap "Agree" to proceed further.
Once the guest account accepts the invitation, the devices will be successfully shared. If the issue remains unresolved, please contact the "EZVIZ support team" for further assistance.
*Please note that sharing functionality is not supported on all EZVIZ devices. If your device does not appear in the sharing list during the sharing process, it indicates that it cannot be shared.
If your EZVIZ cameras support turning off the IR light on the EZVIZ APP, please follow the steps below:
1. Login to your EZVIZ account.
2. On the Home page, click the 3-dot icon next to your camera's name to access the Device Settings page.
3. Locate the IR Light button and uncheck it. Alternatively, scroll down to find Image Settings, select Day Mode and the IR light would be turned off.
(* The interface of the application may be different depending on the version update and device model).
Regarding the issue you are facing, if you mean during the configuration process, the camera made voice prompts like “incorrect password” or "incorrect wi-fi password", please note that this prompt normally suggests the router Wi-Fi password you input is incorrect.
Thus, please double-check and ensure the router password you input is completely correct. Also, be reminded that the password is case-sensitive.
However, if the above is confirmed but the issue persists, you may try to further troubleshoot by changing the password to a simpler one (less than 64 digits) and excluding any special characters.
All CloudPlay videos support quickplay at 1X, 4X, 8X, 16X and 32X speed.
However, if you use a Micro SD card as the storage medium, please note that only some EZVIZ cameras support quickplay on MicroSD card video in 1X, 4X, 8X, and 16X speed. If your device does not support this feature, you can connect your camera and mobile phone under the same router, then on the EZVIZ APP, go to LAN Live View>Tap Start Scanning>View video by Fast Play. For more detailed information, please contact the EZVIZ support team at support@ezviz.com.
Please follow the steps below:
1. Log in to your EZVIZ account.
2. On the Home page, click the 3-dot icon next to the name of your camera to enter the Device Settings page.
3. Turn on the Alarm Notification button, then you will be able to receive the messages when motion detection is triggered. Turn off the Alarm Notification button if you do not want to receive alerts.
4. For some other models, you need to enter Notification on the Settings page, enable Receive Device Message and EZVIZ App Notification. You may disable the Receive Device Message feature if you do not want to receive alerts.
Please kindly note that the device is programmed to timeout every few minutes if you are streaming through our VTDU servers. You can simply tap on the "Continue" button to continue streaming. Besides, if your device supports the LAN Live View feature, you can avoid this by putting your camera and your phone or PC under the same LAN (connecting to the same network), and then going to the More page (click the profile photo on the left top corner) > Settings > LAN Live View (for mobile phone) or Devices on LAN (for PC Studio). There you could view the camera continuously.
However, even when you are on the same network, you should ensure that the computer you are using is connected to the router using a cable, or if you are using a mobile phone or tablet, please ensure that you have Upnp enabled on your router.


How to enable or disable the alarm sound
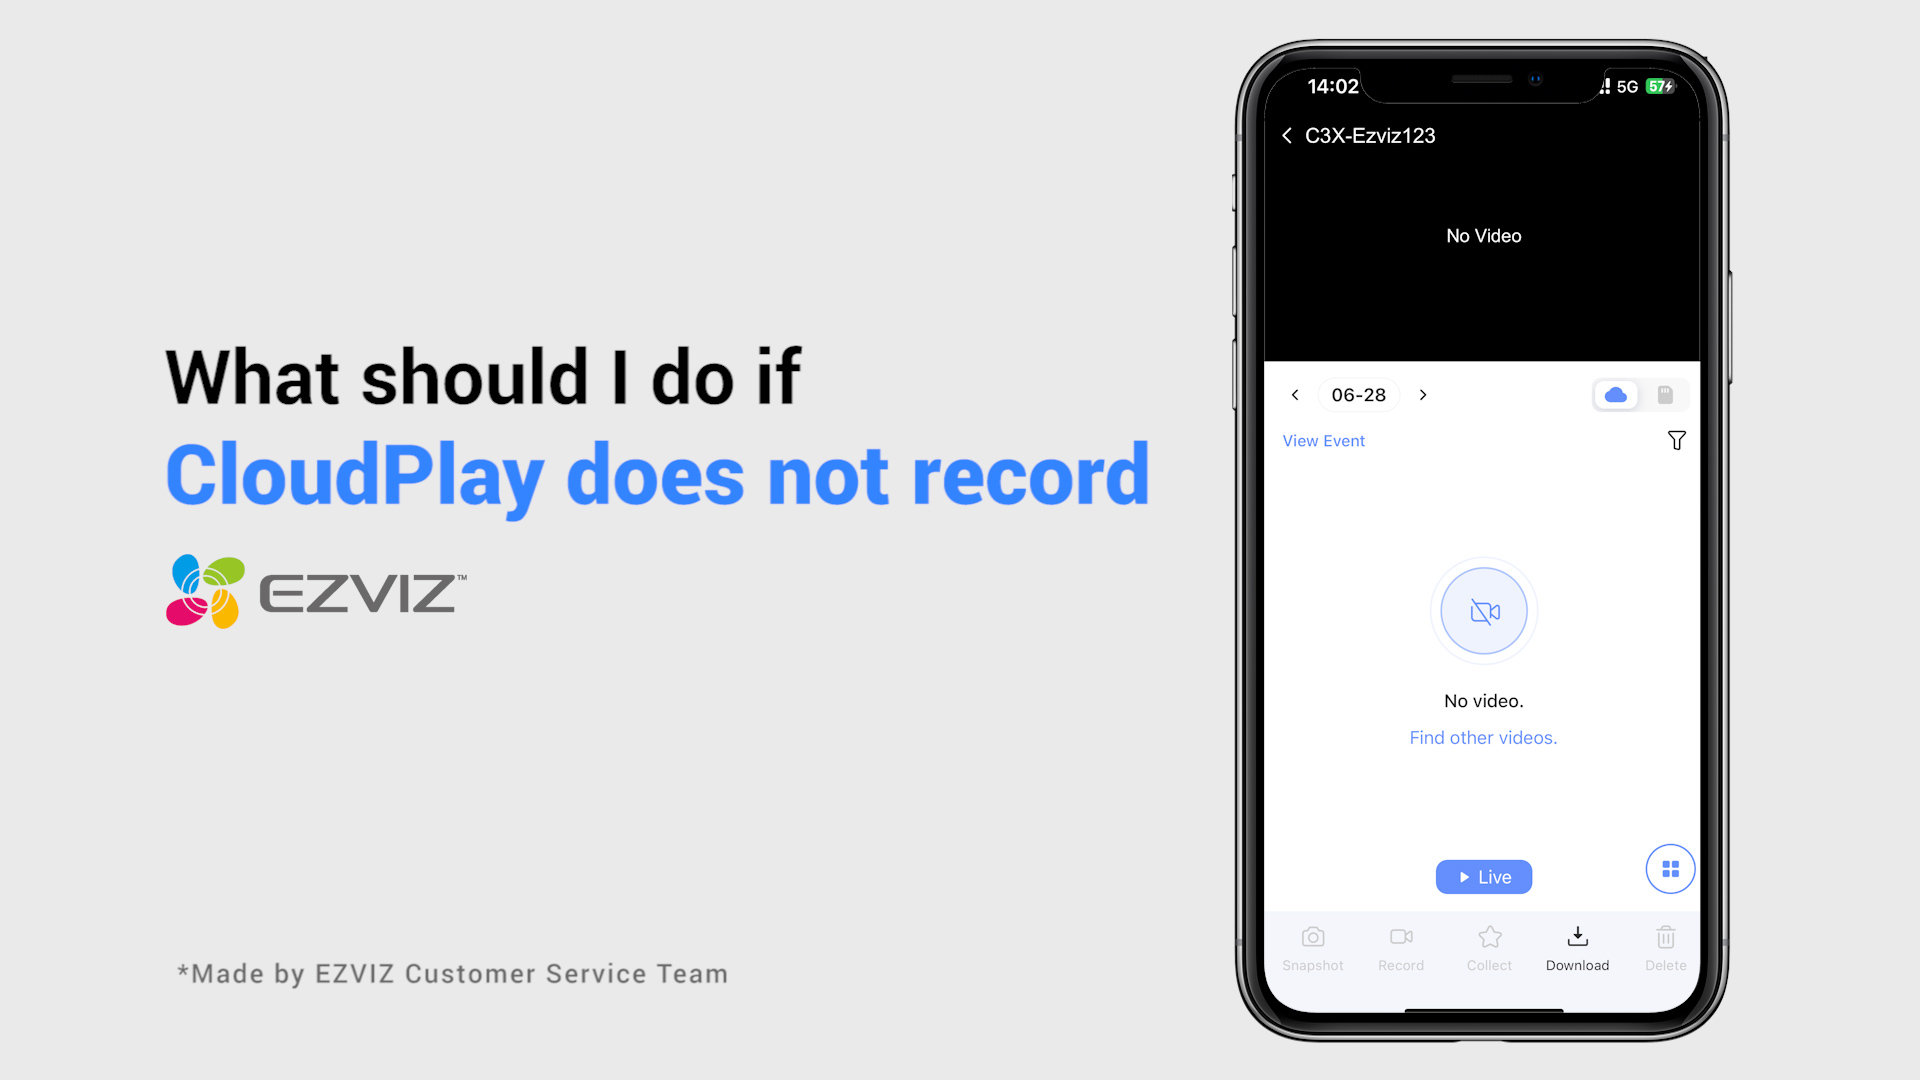
What should I do if CloudPlay does not record

What should I do if my camera goes offline

Indoor Pan & Tilt Cameras Tutorial

