EZVIZ no longer supports Internet Explorer 10 or earlier versions, and the site may not behave as expected. Please upgrade to a newer browser.
1. Windows PCにEZVIZ Studioをインストールし、EZVIZデバイスとPC が同しネットワークに接続します。
2. インストール後、最初にEZVIZアカウントにログインする必要があります。
3. フォルタを開き、Cドライブの中の下記のフォルダまで移動してください。
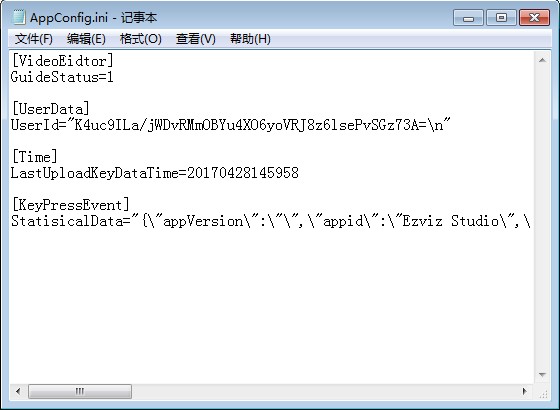
4. 「config」フォルダ内の「AppConfig.ini」データをデスクトップへコピーします。貼り付けた「AppConfig.ini」を開き、次のコマンドが表示されます。
5. 「AppConfig.ini」に次のコマンドを追記して保存します。
```
[LocalOperation]
Show=1
```
6. 保存した「AppConfig.ini」データを、「config」フォルダに戻して上書きしてください。
7. Ezviz Studioでデバイスページをリフレッシュするか、Studioを再起動すると、「詳細設定」が表示されます。
8. 「詳細設定」を非表示にしたい場合は、「Show=1」のコマンドを「Show=0」に変更し、EZVIZ Studioを再起動したら、変更完了です。