We recommend updating your cookie settings to enable full functionality
1. Install the EZVIZ Studio on your Windows PC and make sure that your EZVIZ devices and PC are on the same LAN.
2. After installation, you will need to log in to your EZVIZ account first.
3. Then go to the root directory of Ezviz Studio on your PC and find the folder named “config”.
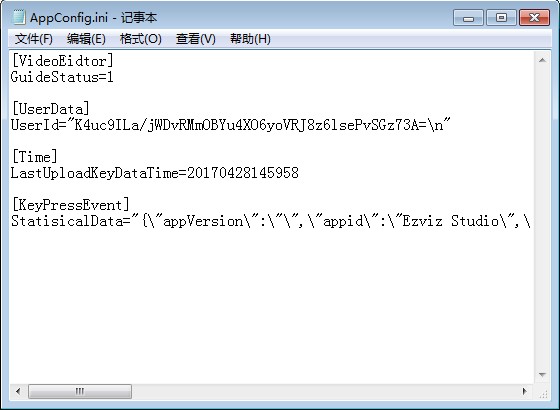
4. Copy the file named "AppConfig.ini" in the folder of "config" to your Desktop. Then open "AppConfig.ini" on the Desktop and you will see the following commands.

5. Add the following command to "AppConfig.ini" and click "Save" before exiting:
[LocalOperation]
Show=1
6. Copy the "AppConfig.ini" file from your Desktop into the folder of “config” and overlay the old one.
7. Refresh the device page in Ezviz Studio or reopen the Studio, then you will see the “Advanced”.
8. If you want to hide the “Advanced” setting, please change the command “Show=1” to “Show=0”, then reopen the EZVIZ studio.
We have updated our Terms of Service, CloudPlay Paid Subscription Terms and Privacy Policy. Please read them carefully.
We provide you with customized service and safe user experience with Cookie. Login and browse our website indicates that you permitted us getting information in/out the website with Cookie. Please visit Use of Cookies